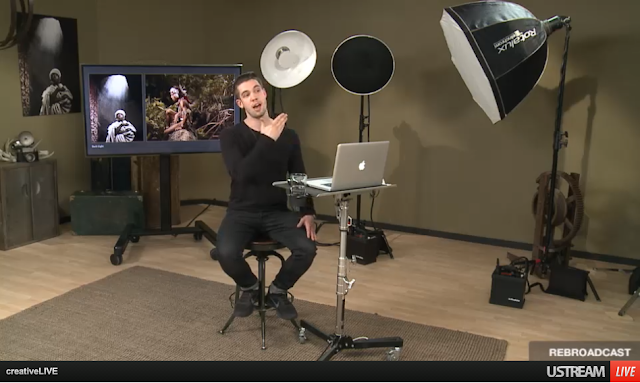
Three-Day Commercial Portraiture Course by CreativeLIVE and Joey L. (Day 1)
Yesterday was the first of a three-day online live-streaming course presented by CreativeLIVE and photographer Joey L. Sign up to watch it today and tomorrow FOR FREE! http://www.creativelive.com/courses/commercial-portraiture-joeyl
Here's what I got out of Day 1:
Joey L., 23, is a commercial portrait photographer who has been shooting since he was 12. He has worked with clients the likes of National Geographic channel and History channel, many different print and digital productions, and celebrities. The course he is teaching this week is on portfolio structure, start-up photography advice, and techniques of "cinematic portraits" in any location. I've heard most of the "beginner" advice before, but here's some selects of his adviceStructure your portfolio in a nice flow:
- Images should logically follow one another. Don't jump from dark to light, action to dramatic portrait, etc. Use color, tone, mood, and subject matter to string together a nice set of images.
- Stick to your vision: if you want people to hire you for what you do best, only show that in your portfolio. If you are "testing" another style or subject matter, keep them to yourself until you are comfortable presenting a strong body of work.
- Print portfolios are just as important as digital slideshows on websites, and he recommends taking a printed portfolio to a face-to-face meeting.
- Clients like to see behind-the scenes photo/video from a shoot. It brings a whole new perspective for the client to see the production aspect of your work.
Photographer Chase Jarvis was invited to have an open chat with Joey in one of the segments of the day, and they discussed several topics, including pricing, agencies, and personal visions.
- "Amateurs wait for inspiration; pros get up and go to work" - Chuck Close
- Be around people whose work you respect, and whose level of work you aspire to achieve.
- For photoshoots, charge what you believe you are worth, not what the client can spend (or not spend). Turn down jobs if they are lowballing. Instead, offer to do it pro-bono (ONLY if you can afford it), because you don't want to be known as the $400 guy/gal in the market if you normally charge $4,000, and the client "just couldn't pay it this time."
- Get the most money you can from a job.
- Show the client an itemized budget so they understand how the money is broken down, instead of just throwing out a huge number and saying "everything's included."
- Agencies usually handle the business end of the photoshoots from budget to travel.
- Research bids and pricing if you need a better idea of how to price a job. He mentioned PDN Magazine case studies, ArtBuyer, and APhotoEditor.
- Sometimes you have to do shoots to make money, so do them, but don't promote those shoots as your main work if they don't fall under your primary artistic vision. Example: You are asked to shoot a friend's wedding, but you are a portrait photographer. It's $2500, so you do the wedding, but you don't promote yourself as a breakout wedding photographer. If that's something you're interested in, develop a larger portfolio of wedding images before promoting your newfound wedded-bliss-capture skills.
- DO TESTS - try new styles, locations, lighting setups, etc.
video by Cale Glendening
from Joey L.'s blog
The last segment of the day was a study of light and a lighting demonstration with a female friend. He uses a style called "additive lighting," which allows his to begin with one main light and add more lights as necessary. With additive lighting, several different lights can be used:
- Main light/key light (illuminates the subject)
- Fill light (fills in dark areas of the photo)
- Backlight/rim light (separates the subject from the background)
- Background light (lights on the background elements)
- Practical/ambient light (existing light in nature: amount of sunlight, street lamps, fire)
He went over several photoshoots that he did, focusing on "Killing Lincoln." He explained lighting techniques, using test subjects, and posing variety.
A few more tidbits and Joey's equipment of choice:
- Deep-set Octabank (like this one) for a desired light-wrapping effect
- Profoto 7B power pack (like this one)
- Proglobe (like this one) to illumate more area while maintaining the soft, diffused light
- Neutral density filters to allow for correct exposure of scenes with light sources of multiple intensities. ND filters back up the exposure 3 stops. Lee ND .9
Looking forward to Day 2!


.jpg&container=blogger&gadget=a&rewriteMime=image%2F*)

Comments